
This SOP explains how to access the portal, generate an End-of-Day (EOD) report for a selected date range, review it for accuracy, and print the final report. Following these steps ensures the report is generated accurately and consistently.
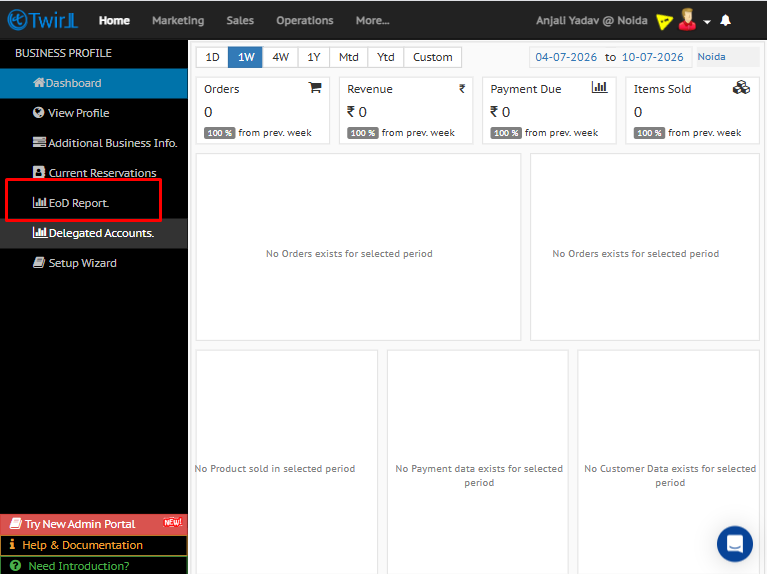
1. Log in to the Portal and Open the EOD Report Section
- From the main menu or dashboard, navigate to the EOD Report section.
2. Select the Required Date Range and Print It
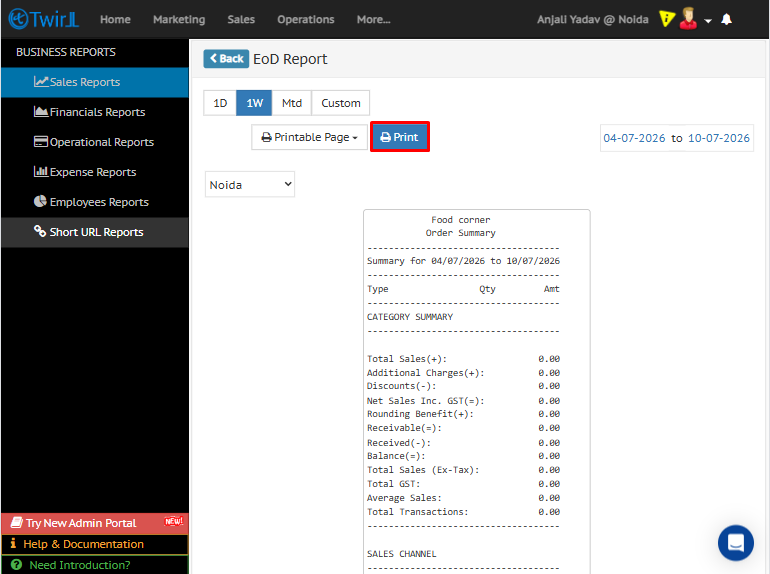
- Use the date range fields to choose the reporting period.
- Verify that the selected dates match the required EOD report.
- Review the report carefully to ensure all data is accurate and complete.
- Check for missing entries, incorrect dates, or other obvious errors.
- Once verified, click Print to generate the final EOD report.
Related links :