
This explains how to upload item images in Twirll using either the Media Library or direct upload from your system. It ensures team members can correctly update and save images for individual products.
Keeping product images updated helps maintain a fresh and attractive catalog. Twirll allows you to upload images in two ways:
You can upload images from:
-
Media Library (previously uploaded images)
-
Your device storage (laptop/desktop)
Follow the steps below to upload or update images for any product
Step 1: Go to Item Overview
Navigate to: Operations → Manage Inventory → Item Overview

Step 2: Click on the item/product for which you want to upload or update the image.
Step 3: Click on the default image or blank placeholder to open the image.

Option 1: Upload Image from Media Library
When the image upload modal opens, you will see:
Media Library (#1):-View all previously uploaded images in your system.
Select Image (#2):-Choose one or multiple images you want to attach to the product.
Confirm Selection (#3):-Click Select Image to confirm your selection.
You can also upload new images through Manage Albums if required.

Step 4: After confirming your selection, the images will be tagged to the item.
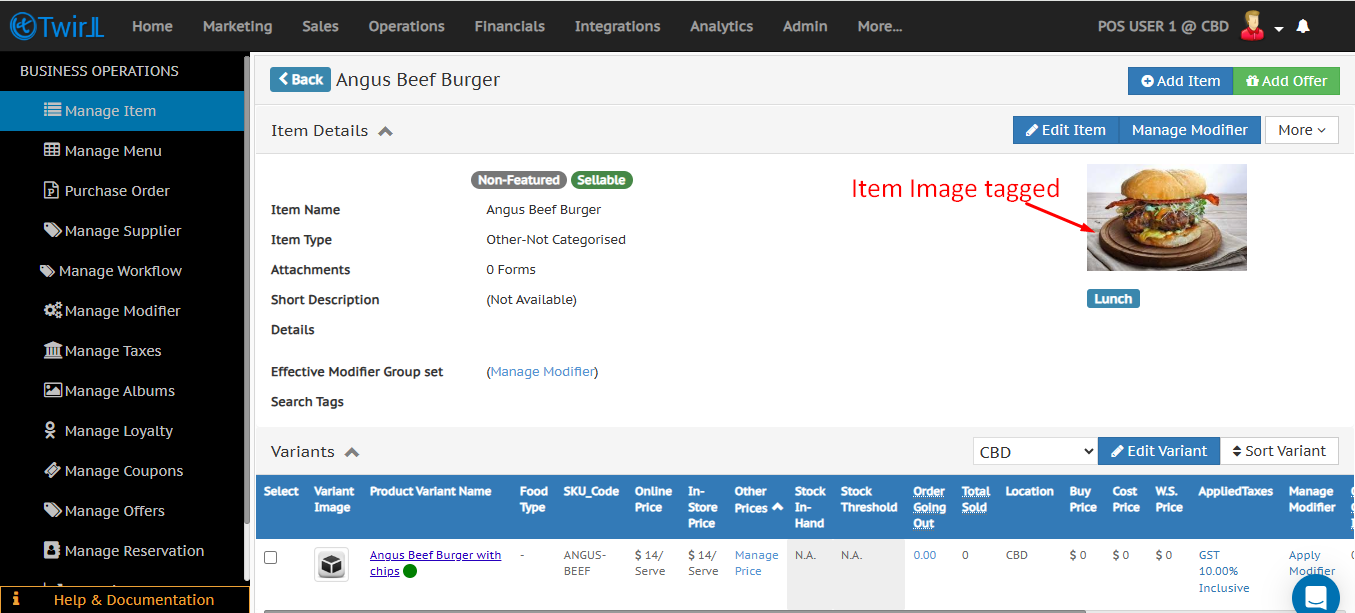
Option 2: Upload Image from Device Storage
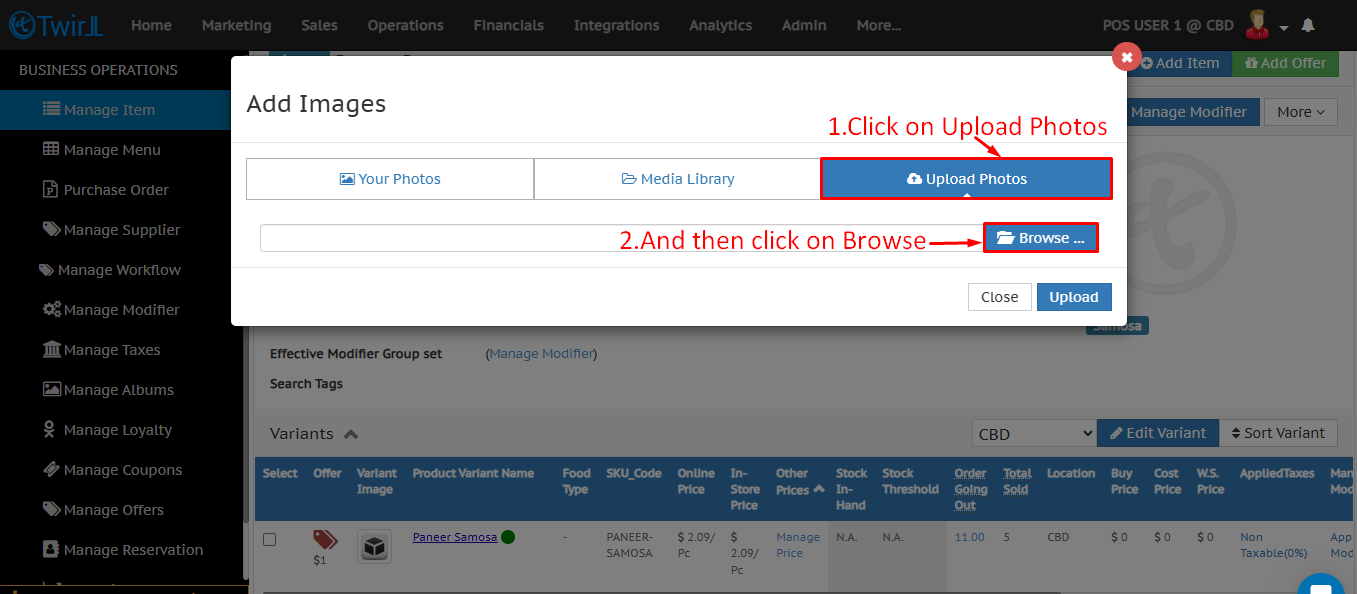
Step 1: Click Upload Photos, Then click Browse to upload an image from your laptop.
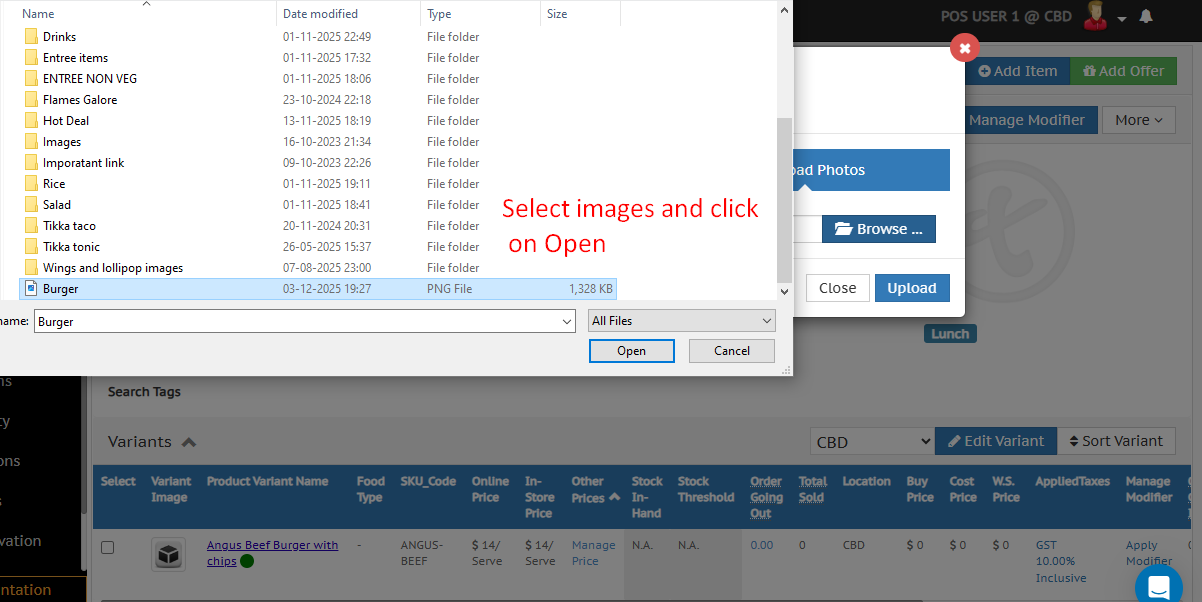
Step 2: Select the image from your computer
Step 3: Click on upload
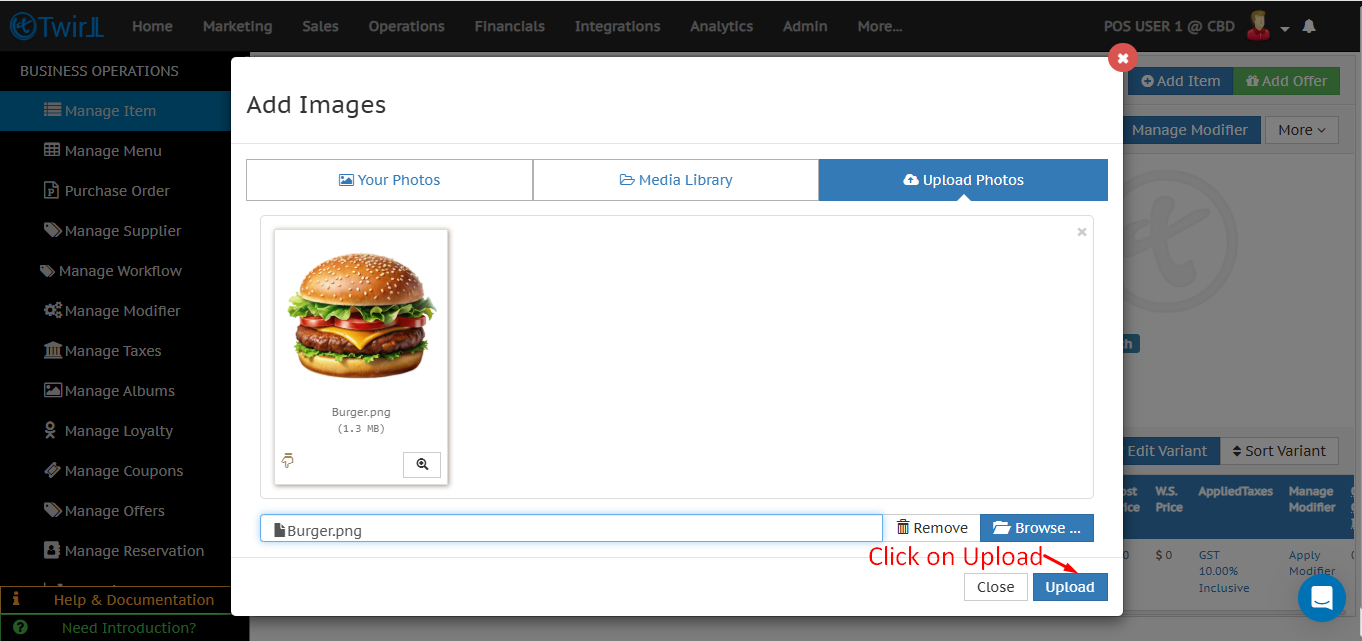
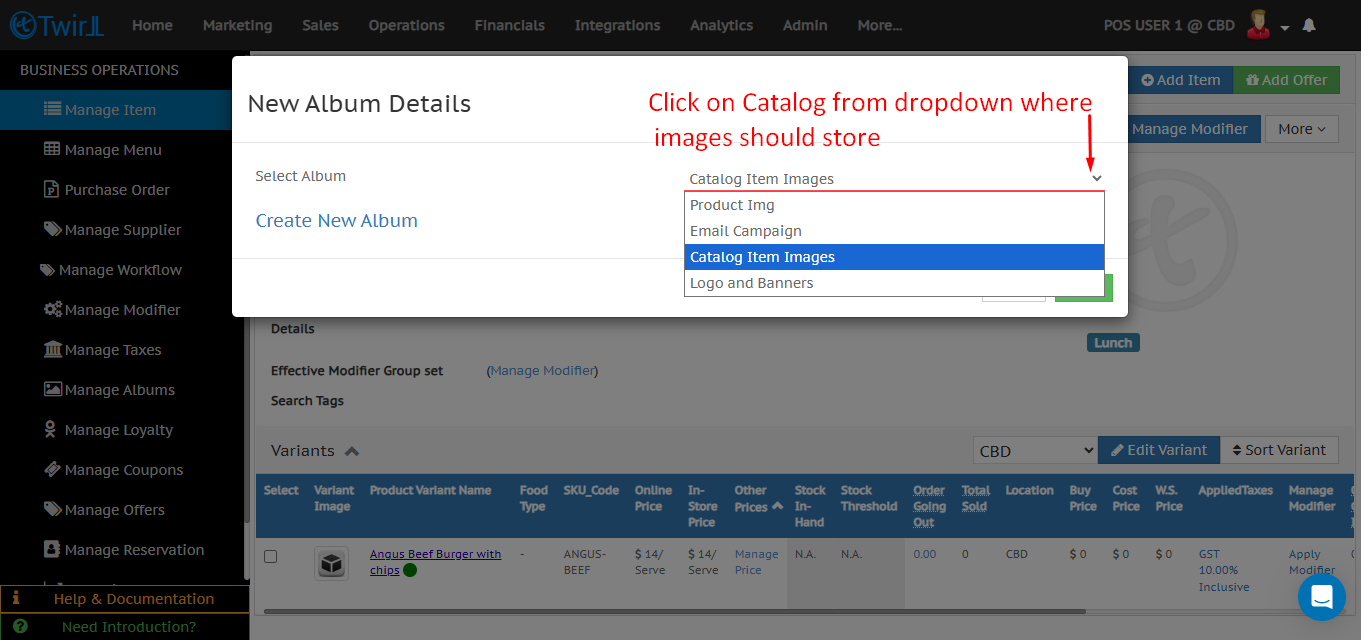
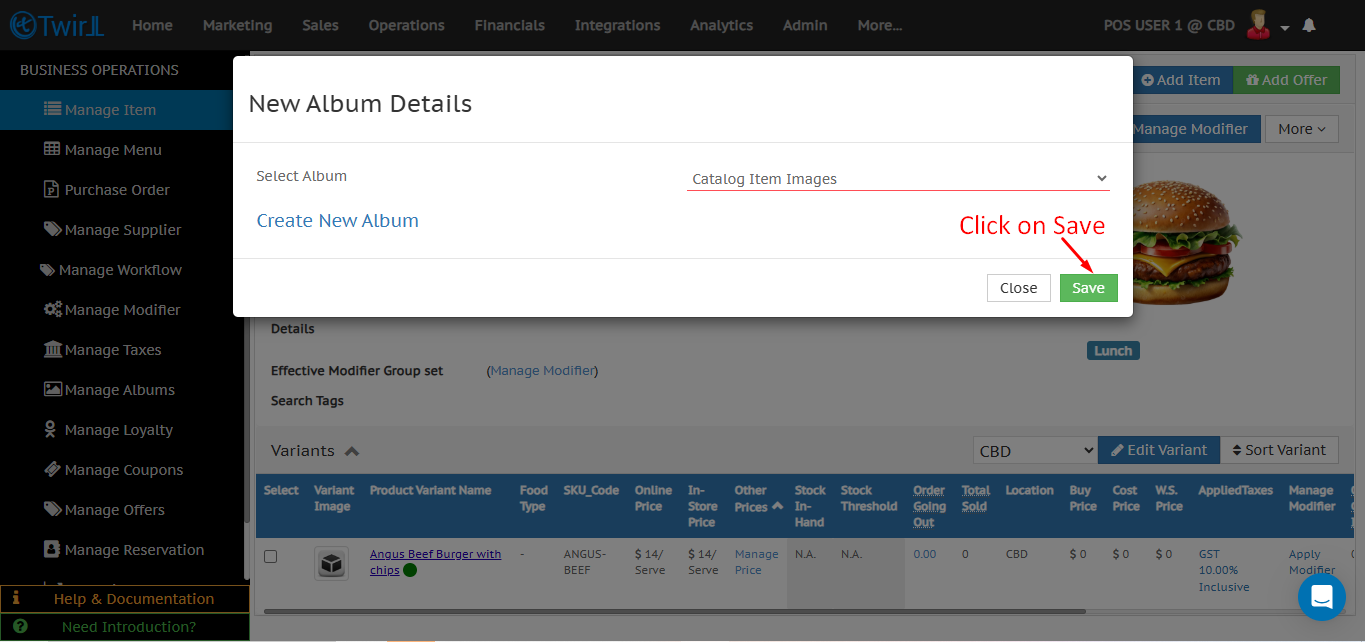
Step 4: Choose Category & Save, Select the appropriate category name from the dropdown to store the image and click Save.
Related documents :
How to add images to Twirll Portal
Tag images to Variants
Bulk Images Tagging To multiple Products